Aire Serv explains why weather stripping is an effective way to improve home energy efficiency and comfort.
- Inspect doors and windows for drafts or gaps
- Choose the appropriate weather stripping material
- Clean and dry surfaces before application
- Measure and cut weather stripping to fit
- Press or adhere weather stripping firmly in place
Ever heard the saying “Beware of little expenses. A small leak will sink a great ship”? Your home may not set sail, but small cracks can sink your energy budget. Sealing small cracks can make a huge difference to your energy use and comfort.
Weather stripping really works. Read on to learn about its benefits, recommended application techniques, and more.
Why Do I Need Weather Stripping?
According to the U.S. Environmental Protection Agency’s Energy Star program, air leaks in the home are estimated to cause 25–40% of energy loss in heating and cooling. Though high energy bills aren’t always an indicator of air leaks, it’s worth investigating.
Because of its exposure to the elements, and daily wear and tear, old weather stripping is less effective than new products. First check your existing seals by:
- Looking for cracks, missing parts, or damage in the stripping. Depending on the amount of damage, you may want to consider a new weather stripping type.
- Identifying any gaps by trying to slip a piece of paper under your door or window – if it goes through easily, your weather stripping needs to be reapplied or reinforced.
- Feeling for drafty areas by using a candle to notice any wavering.
From there, you can determine if you need weather stripping replacement or a full home inspection. It may be that other factors are contributing to heat loss in your home, and a licensed HVAC technician can help.
How Long Does Weather Stripping Last?
The lasting power of your weather stripping depends on what type of weather stripping you use in your home and where. The most durable option is interlocking metal, which should last you a lifetime as long as it’s installed correctly. Other common options, like v-strips (tension seals) and tubular inserts, are somewhat easier to install and last around five years. Less expensive options such as door sweeps, tapes, felt, and some foams can be easy to install, but usually will only last a few years depending on the material type.
Other factors include the natural wear and tear of any weather stripping type in your home. Your door weather stripping usually will wear out far more quickly than windows, based on the frequency of use.
Related Topic: Cold Weather Checklist: Keeping the Cold Out
What Is the Best Type of Weather Stripping?
In terms of overall durability and effectiveness, interlocking metal seals are the best option but require professional installment, as alignment is critical. V-strips are one of the more common, easy to install, and durable options to install. Tubular options are similarly common and effective but can be more difficult to install.
The best type of weather stripping for your home will ultimately depend on your needs and budget. If you just have small air leaks in your door or windows, you might just need an easy-to-install, flexible option like tape or felt.
Related Topic: Check Your Home for Leaks and Drafts
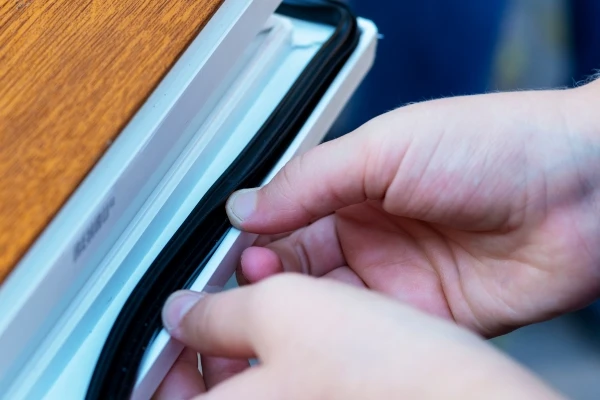
How to Weather Strip a Door
There are many types of weather stripping, and while most involve a similar installment process, some may require more adjustments or professional assistance. Always check the manufacturer’s instructions before installing. For some basic installment guidance, follow these steps:
-
Check for loose hinges and tighten them. This will help you to correctly measure the gap between the door and the jamb and might also resolve your draft issues.
-
Remove any old weather-stripping materials. You can usually do so by using a pry bar or spraying adhesive remover. Once the remover has sat for a while, you can fully remove the remaining adhesive with a putty knife and clean off any residual dirt.
-
Measure the gap between the door and the jamb. Close the door and measure between the door, the jamb, and the doorstop. Then measure along the side and the top.
-
Determine the type of weather stripping desired and the level of thickness needed to fill the gap.
-
If the material needs to be cut to your measurements (v-strips, foam, felt, some door sweeps), then do so with scissors, tin snips, or a hacksaw, based on the material type. Cut and install the long sides first.
-
For tubular weather stripping, you’ll need to install the seal around the exterior of the door between the door and the door jam. Fasten the track to the exterior jambs against the edge of the door. It will either have an adhesive sticker or holes for screws. Screw the long side strips into place first and then measure and cut the shorter strip to fit between them along the top of the door.
-
If your door has a manufactured groove for weather stripping, you can use vinyl or metal v-strips that have a tongue to press into the groove. If you don’t have a groove, you can apply adhesive stripping (tape, foam, etc.) in the same location. Or you can consider cutting groves with a special grooving tool—although, professional cutting and installation would be advised at this point.
-
For simpler face-mounted door sweeps, you can measure and cut it to fit the interior face of the door and screw it in with the holes and screws provided. More complex sweeps may require you to take your door off its hinges or install it into precut groves.
-
Test the operation of your door to make sure it closes correctly. Then check to make sure no gaps remain.
Tired of the cold creeping in? The experts at Aire Serv can help you determine other sources of heat and energy loss in your home. It may be that your HVAC system needs servicing or replacement. Whatever the reason, we’re here to help. Call us or request an appointment online to learn more about your options.